8. Context storage benchmarking#
This tutorial shows how to benchmark context storages.
For more info see API reference.
[1]:
# installing dependencies
%pip install -q dff[benchmark,postgresql,mongodb,redis,mysql,sqlite,ydb]
Note: you may need to restart the kernel to use updated packages.
[2]:
from pathlib import Path
from platform import system
import tempfile

import dff.utils.db_benchmark as benchmark
Context storage setup#
[3]:
# this cell is only required for shelve and sqlite databases
tutorial_dir = Path(tempfile.mkdtemp())
db_path = tutorial_dir / "dbs"
db_path.mkdir()
sqlite_file = db_path / "sqlite.db"
sqlite_file.touch(exist_ok=True)
sqlite_separator = "///" if system() == "Windows" else "////"
[4]:
storages = {
    "Shelve": f"shelve://{db_path}/shelve",
    "PostgreSQL": "postgresql+asyncpg://postgres:pass@localhost:5432/test",
    "MongoDB": "mongodb://admin:pass@localhost:27017/admin",
    "Redis": "redis://:pass@localhost:6379/0",
    "MySQL": "mysql+asyncmy://root:pass@localhost:3307/test",
    "SQLite": f"sqlite+aiosqlite:{sqlite_separator}{sqlite_file.absolute()}",
    "YDB": "grpc://localhost:2136/local",
}
Saving benchmark results to a file#
Benchmark results are saved to files.
For that there exist two functions: benchmark_all and save_results_to_file.
Note: context storages passed into these functions will be cleared.
Once the benchmark results are saved to a file, you can view and analyze them using two methods:
Using the Report Function: This function can display specified information from a given file. By default, it prints the name and average metrics for each benchmark case.
Using the Streamlit App: A Streamlit app is available for viewing and comparing benchmark results. You can upload benchmark result files using the app’s “Benchmark sets” tab, inspect individual results in the “View” tab, and compare metrics in the “Compare” tab.
Benchmark results are saved according to a specific schema, which can be found in the benchmark schema documentation. Each database being benchmarked will have its own result file.
Configuration#
The first one is a higher-level wrapper of the second one. The first function accepts BenchmarkCase which configures databases to be benchmarked and parameters of the benchmarks. The second function accepts only a single URI for the database and several benchmark configurations. So, the second function is simpler to use, while the first function allows for more configuration (e.g. having different databases benchmarked in a single file).
Both function use BenchmarkConfig to configure benchmark behaviour. BenchmarkConfig is only an interface for benchmark configurations. Its most basic implementation is BasicBenchmarkConfig.
DFF provides configuration presets in the basic_config module, covering various contexts, messages, and edge cases. You can use these presets by passing them to the benchmark functions or create your own configuration.
To learn more about using presets see Configuration presets
Benchmark configs have several parameters:
Setting context_num to 50 means that we’ll run fifty cycles of writing and reading context. This way we’ll be able to get a more accurate average read/write time as well as check if read/write times are dependent on the number of contexts in the storage.
You can also configure the dialog_len, message_dimensions and misc_dimensions parameters. This allows you to set the contexts you want your database to be benchmarked with.
File structure#
The files are saved according to the schema.
[5]:
for db_name, db_uri in storages.items():
    benchmark.benchmark_all(
        file=tutorial_dir / f"{db_name}.json",
        name="Tutorial benchmark",
        description="Benchmark for tutorial",
        db_uri=db_uri,
        benchmark_configs={
            "simple_config": benchmark.BasicBenchmarkConfig(
                context_num=50,
                from_dialog_len=1,
                to_dialog_len=5,
                message_dimensions=(3, 10),
                misc_dimensions=(3, 10),
            ),
        },
    )
Running the cell above will create a file with benchmark results for every benchmarked DB:
[6]:
list(tutorial_dir.iterdir())
[6]:
[PosixPath('/tmp/tmpmpnw9h8l/Redis.json'),
 PosixPath('/tmp/tmpmpnw9h8l/SQLite.json'),
 PosixPath('/tmp/tmpmpnw9h8l/dbs'),
 PosixPath('/tmp/tmpmpnw9h8l/YDB.json'),
 PosixPath('/tmp/tmpmpnw9h8l/PostgreSQL.json'),
 PosixPath('/tmp/tmpmpnw9h8l/MongoDB.json'),
 PosixPath('/tmp/tmpmpnw9h8l/MySQL.json'),
 PosixPath('/tmp/tmpmpnw9h8l/Shelve.json')]
Viewing benchmark results#
Now that the results are saved to a file you can either view them using the report function or our streamlit app.
Using the report function#
The report function will print specified information from a given file.
By default it prints the name and average metrics for each case.
[7]:
benchmark.report(
    file=tutorial_dir / "Shelve.json", display={"name", "config", "metrics"}
)
--------------------------------------------------------------------------------
Tutorial benchmark
--------------------------------------------------------------------------------
Benchmark for tutorial
--------------------------------------------------------------------------------
simple_config
--------------------------------------------------------------------------------
params: {'context_num': 50, 'from_dialog_len': 1, 'to_dialog_len': 5, 'step_dialog_len': 1, 'message_dimensions': [3, 10], 'misc_dimensions': [3, 10]}
sizes: {'starting_context_size': '4.9K', 'final_context_size': '12.7K', 'misc_size': '592B', 'message_size': '1.2K'}
--------------------------------------------------------------------------------
Write: 0.000112     Read: 0.000111      Update: 0.000119    Read+Update: 0.00023
--------------------------------------------------------------------------------
Using Streamlit app#
To run the app, execute:
# download file
curl "https://deeppavlov.github.io/dialog_flow_framework/"\
"_misc/benchmark_streamlit.py" -o benchmark_streamlit.py
# install dependencies
pip install dff[benchmark]
# run
streamlit run benchmark_streamlit.py
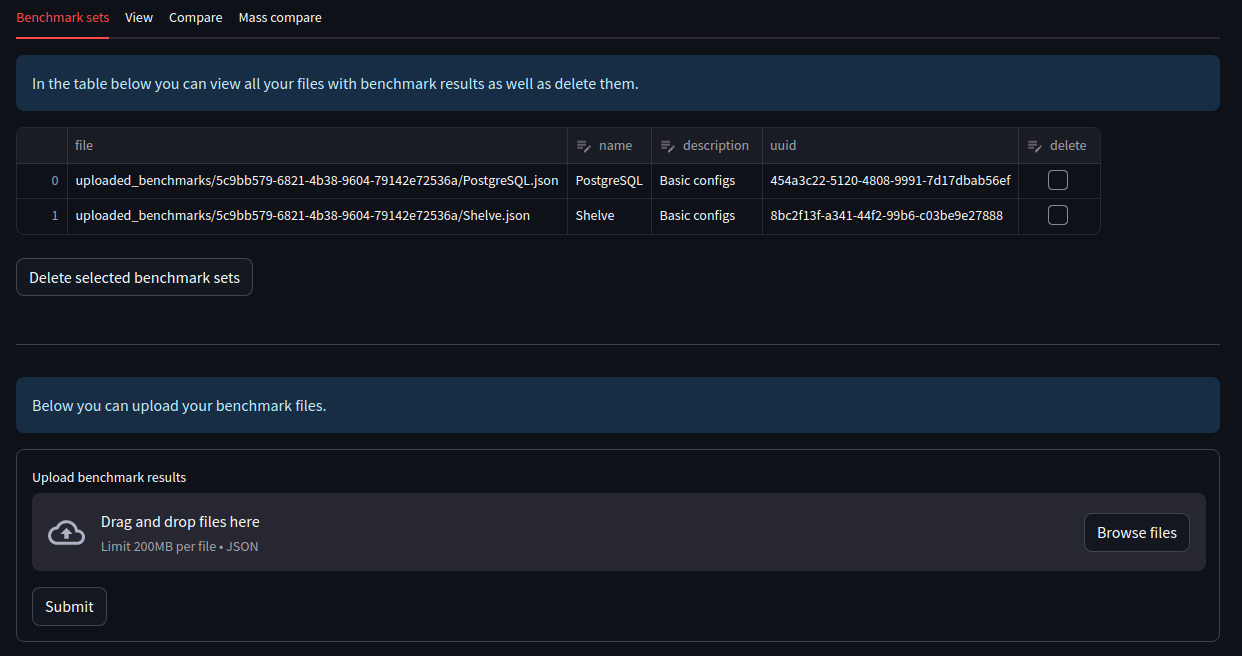
You can upload files with benchmark results using the first tab of the app (“Benchmark sets”):
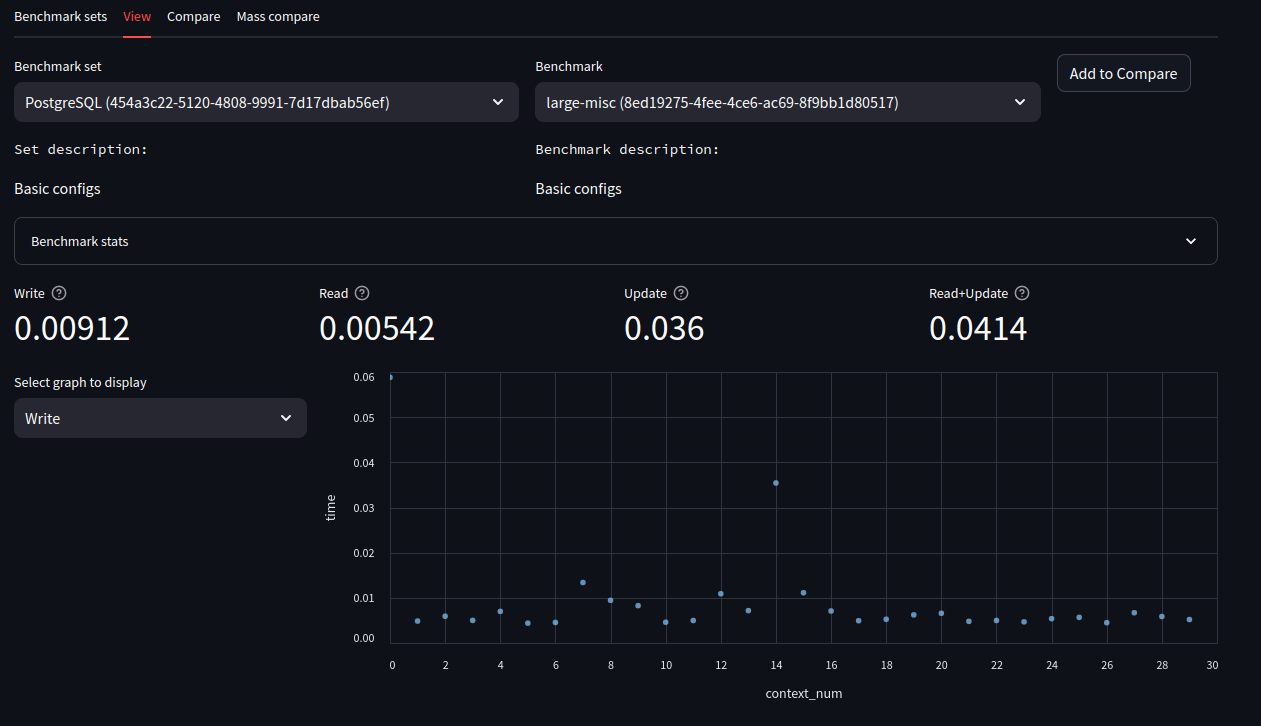
The second tab (“View”) lets you inspect individual benchmark results. It also allows you to add a specific benchmark result to the “Compare” tab via the button in the top-right corner.
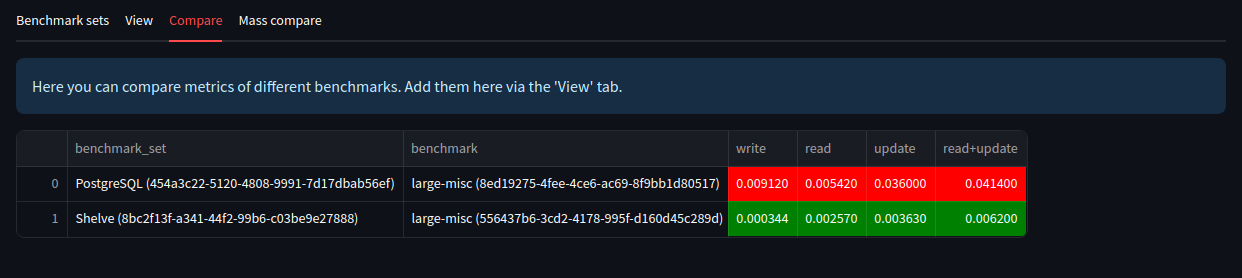
In the “Compare” tab you can view main metrics (write, read, update, read+update) of previously added benchmark results:
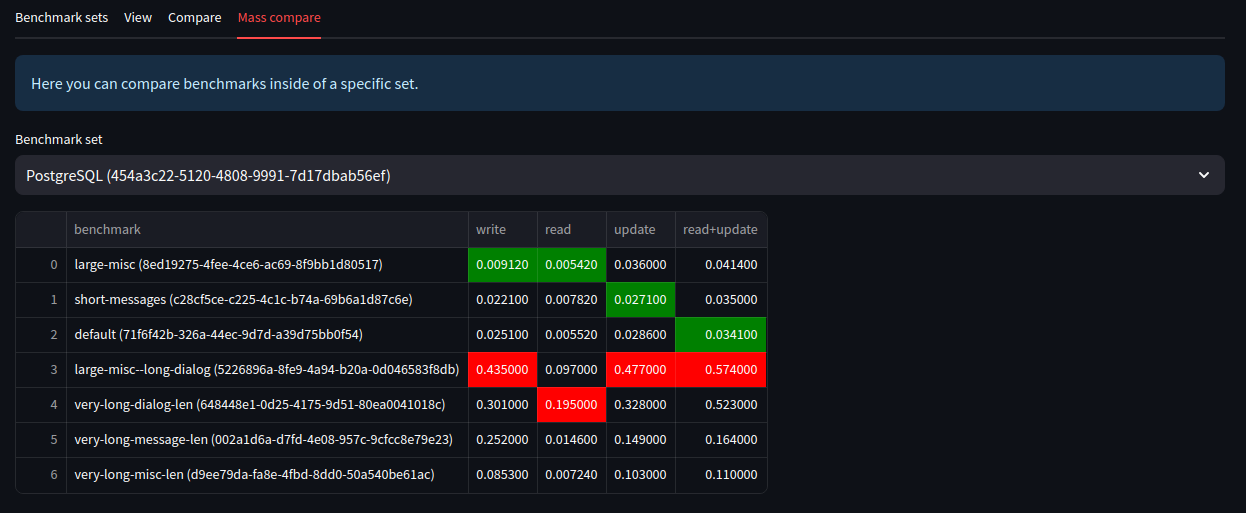
“Mass compare” tab saves you the trouble of manually adding to compare every benchmark result from a single file.
Additional information#
Configuration presets#
The basic_config module also includes a dictionary containing configuration presets. Those cover various contexts and messages as well as some edge cases.
[8]:
print(benchmark.basic_config.basic_configurations.keys())
dict_keys(['large-misc', 'short-messages', 'default', 'large-misc--long-dialog', 'very-long-dialog-len', 'very-long-message-len', 'very-long-misc-len'])
To use configuration presets, simply pass them to benchmark functions:
benchmark.benchmark_all(
    ...,
    benchmark_configs=benchmark.basic_configurations
)
Custom configuration#
If the basic configuration is not enough for you, you can create your own.
To do so, inherit from the BenchmarkConfig class. You need to define three methods:
get_context– method to get initial contexts.info– method for getting display info representing the configuration.context_updater– method for updating contexts.